Linear Gamma Workflow in Fusion
Of course you can work in linear gamma in Fusion. In fact, Fusion expects images to be linear. If you simply load an sRGB image and start working on it, you’re doing it wrong.
This is part of a series of articles dealing with color workflows in Fusion. Other parts:
Linear Gamma Workflow Part 2 and Rendering rec709.

The Problem
Now, it’s been two years since Nuke has set the industry standard for an intuitive linear compositing workflow and Fusion has done nothing to keep up. (update: it’s 2014 so it’s 4 years now and Fusion 7 hasn’t improved the situation…) Why do people still ask in forums if Fusion can work linear or how to set up an sRGB LUT? Because while Fusion’s LUT engine is much more powerful than Nuke’s, its corresponding interface leaves a lot to be desired (to put it politely). While in Nuke you have to consciously do things to break its linear workflow, you have to know what you’re doing to work linear in Fusion. And even then, you’re gonna trip over its LUT GUI all the time. There’s probably a reason why even in eyeon’s official YouTube videos the LUT button is disabled.
The Solution
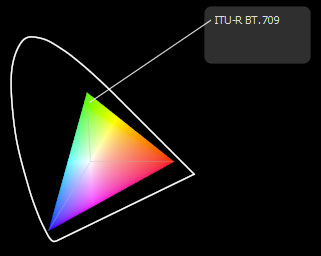
 So here’s the deal. You want to view your images in sRGB or rec709 color space, you want to have access to a gamma slider to quickly check your black levels and all of this should be saved in a convenient default for all your comps.
- Download these GPU-accelerated viewshaders: srgb_rec709_viewshaders.zip
- Unzip them into your Fuses directory, usually something like C:\Users\Public\Documents\eyeon\Fusion\Fuses\
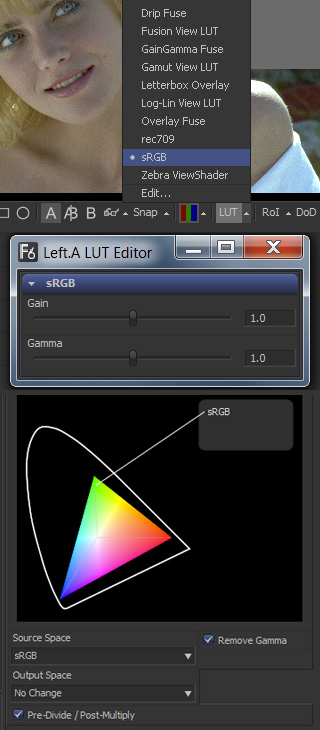
- Restart Fusion and click the triangle next to a viewer’s LUT button. Choose sRGB or rec709.
- Enable the LUT by pressing the LUT button.
- Right-click a viewer, then select Settings… -> Save Defaults
Now all you need to do is convert all non-linear images by adding a Gamut tool after the Loader, set its source color space (if unsure, choose sRGB) and make sure the Remove Gamma option is checked (which it should be by default). Done. Oh, the footage should be in float16 or float32 of course. If you’re loading jpegs, make sure the Loader is converting this for you.
You can choose LUT -> Edit… to bring up gain and gamma controls like in Nuke. These settings will be forgotten once you switch to another LUT but they are meant for temporary image checks anyways, so that’s not much of a problem. (update: Fusion 7 or later finally remembers these LUT sliders)
These GUI issues aside, Fusion actually provides an excellent API for writing GPU-accelerated tools. As these viewshaders demonstrate, you can use the CG shader language inside a LUA script (.fuse files). Here are two additional examples that I whipped up in about an hour:
- Alexa LogC to linear or sRGB (play back Alexa footage without converting)
- Letterbox Overlay (preview letterboxing right in the viewer by defining an aspect ratio or the height of the black bars in pixels)
Fusion also allows you to use OpenCL inside LUA which enables you to write custom tools that execute at lightning speed on your graphics card and are compiled on the fly.
A lot of example code comes with Fusion or can be found on vfxpedia. The guys at Anatomical Travelogue have also published the source of some of their plugins and I’m currently putting the finishing touches onto a GPU-accelerated corner pin plugin, the source of which can be found on the pigsfly forum. It took me a couple of days to write, but most of the time wasn’t spent on fiddling with the API or with OpenCL but trying to get accustomed to the matrix math involved.
Appendix
Just to complete this topic, here’s the way you’d set up an sRGB LUT in Fusion without my CG shaders. You need to activate the Gamut View LUT, choose LUT -> Edit and set its output to sRGB and “Add Gamma”. If you switch to another LUT and back to Gamut View, you’ll have to repeat these steps. Bummer. Moreover, this won’t give you a convenient gain/gamma slider like Nuke has.
For this, you would have to activate the GainGamma Fuse first. Then, in the viewer’s context menu go to LUT… -> Add New -> Gamut View LUT. You can now save this combination of shaders as a LUT chain in the context menu’s LUT… section or as a default for the viewport by choosing Settings… -> Save Defaults. You can do the same for rec709 and toggle between both setups using the context menu. The LUT button’s popup menu won’t help you anymore.
Now download those shaders instead and spare yourself the trouble 🙂
Nuke’s Smooth Ramp Functions
Nuke’s Ramp node can produce linear and smooth gradients. Here are its formulas. I have reverse-engineered them by trial and error after reading up on interpolation formulas like smoothstep (nicely summed up on this website).

In these formulas, “x” denotes a value from 0 to 1. The result falls into the [0-1] range as well and needs to be scaled by the desired end color if you want an RGB ramp.
// linear
y = x
// plinear: perceptually linear in rec709
y = pow(x, 3)
// smooth: traditional smoothstep
y = x*x*(3 - 2*x)
// smooth0: Catmull-Rom spline, smooth start, linear end
y = x*x*(2 - x)
// smooth1: Catmull-Rom spline, linear start, smooth end
y = x*(1 + x*(1 - x))
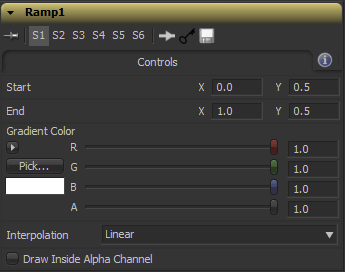
Here’s a ramp macro for Fusion which allows you to draw ramps directly onto an image like in Nuke. Fusion’s own BG tool is of course much more flexible, but it requires you to merge its gradient manually and it has no easy switch for smoothstep gradients.

Compositing Tutorial Part 2
Here’s part 2 of my compositing tutorial series. It’s still about tweaking the camera move of our turntable shot. This time, I’ll demonstrate some expressions to retime one camera move based on the angle of another one so the projection’s distortion is minimized. You can grab the comps and footage on my tutorial page.
httpvh://www.youtube.com/watch?v=AP4Yw8lkXkk
Using these techniques, you can integrate matchmoved footage into modified camera moves. This may be necessary because there were problems with the camera move on set (bumpy, wrong pacing, …), the director changes his mind or the intended camera move wouldn’t have been possible in real life.
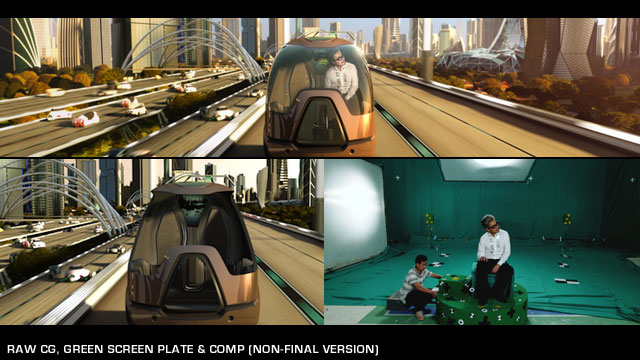
I have employed this technique on the EXPO project. The scene can also be found at the end of the tutorial video. The actor was shot on a turntable and the camera move went like this:
- pull camera away from actor
- rotate actor by 90 degrees
- dolly in
Of course this makes for a really crappy camera move if you add a CG environment since it’ll look nothing like what a real camera crane operator would perform. The final shot was designed in 3D so the plate that was shot had to be integrated somehow. I had to cut out a piece of the original plate, luckily for us the actor was sitting still. After a bit of additional 2D stabilization (the matchmove wasn’t that exact apparently) the plate matched perfectly.

Christmas Card Origami Animation
Excellent full-CG piece:
I suspected the snow globe to be CG but throughout the video I thought that the animals around it were stop-motion origami sculptures.
See more work from the artist at mono-motion.com or visit the flickr album for work-in-progress screenshots.
Python & Fusion Video Tutorial
I’ve finished another video tutorial for Fusion. It covers Python scripting and takes a look at the object oriented model of controlling Fusion’s tools, querying their attributes and setting keyframes.
httpvh://www.youtube.com/watch?v=n_c7UJY2FSg
Download the script that’s shown in the video.
Vertical Alignment
I’ve finished another quick video tutorial, this one is about vertical alignment in stereo shots. It’s done with Fusion but this technique requires no plugins and can even be done in Photoshop 🙂
httpvh://www.youtube.com/watch?v=Ll6nKefUfRc&hd=1
I have enabled Youtube’s automatic transcript just for the fun of it. It used speech recognition and it’s funny how some phrases are transcribed perfectly despite my German accent while others are jibberish. You can download the subtitle file though and it only takes a few minutes to edit the transcript and re-upload it again.
So enjoy the English captions on this tutorial! Here are some funny phrases that Google’s voice recognition software had produced initially:
0:00:09.809,0:00:14.019
as you probably know there are lots of things that can give the bureaucratic when it comes to stereoscopic footage0:00:14.019,0:00:17.960
the most important one is spiritual alignment0:01:05.239,0:01:07.340
the monogram version wants it0:01:20.080,0:01:22.230
his foreign troops of the ride i0:01:35.240,0:01:38.929
since the transform which is his offspring you have to hold down the
aisle to key while driving the mention of your porch0:02:48.259,0:02:55.259
now zoom back into the top left corner and adjust the anglo french haitian0:02:57.629,0:03:01.020
using the cursor keys left and right then
you can get justice in smaller steps

You tell 'em, Sly!