Comp-Fu Answers Part 3
More recurring search terms that have led people to my blog!
optical flares for fusion
No.
what the user wanted
what the client wanted
what the customer wanted
I think you’re all after the same thing 🙂
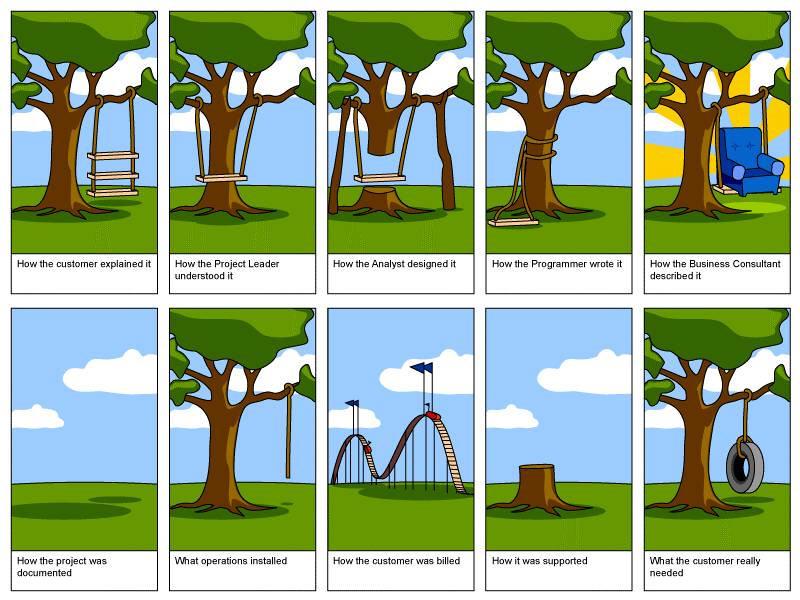
source: unknown
vfx naming convention
Now, this is actually quite an interesting topic. I’ve worked at a dozen small to medium companies as a freelancer and one thing’s for sure: everybody does it differently. Some places even opt for a content/asset management system that allows artists to name things the way they want. Only when checking something into the database, files will get tagged and renamed.
For the rest of us, it’s probably enough to have a naming convention that works on the file system as it is. This is usually done by combining so-called “tokens” via underscores (“XMEN_04-100_comp_v012.0001.exr”). Depending on the departments you have and whether your project’s shot are split up into sequences, things differ wildly. However, here are some best practices. Interestingly, all of them are just workarounds for the fact that file systems and the file managers that come with each OS are really, really bad for VFX work. So the database-driven CMS isn’t such a bad idea after all 🙂
Rule no. 1:
Write scripts that take care of file names. Every time an artist has to enter a file name or – heaven forbid – create a directory manually, chances are he’ll fuck it up. Scripting is easy for compositing or 3D apps, but a nightmare for AfterEffects, Photoshop or e-Mail attachments.
Rule no. 2:
Don’t over-engineer things by stuffing everything into a file name. That’s what metadata is for. But do make sure you can figure out where a file came from just by looking at its name: call it the same as the scene/comp/script that created it and then some but think twice about adding a department code, artist name, image size token or color space info to every frickin’ file name.
Rule no. 3:
Adjust to your file manager’s capabilities. They suck on every OS but even with an asset management system in place you’ll want to browse directories sooner or later. This means files should be easy to find and sorted logically:
- General strings first, then get more specific as you add tokens to the file name. It’s better to do shot_task_version than artistname_shot_version.
- Dates should be written as YYYYMMDD so they sort correctly.
- Version and frame numbers should have a fixed amount of digits, padded with zeros (e.g. v003)
- One file sequence per directory, named the same as the directory it’s in. Exceptions for multi-pass renderings (put em all in one folder) or multiple output resolutions of the same shot (split into subfolders like “jpg1080p” or “hd_exr” so the files themselves don’t have to contain this token).
- A new version of a file (rendering/comp/animation) should only differ in one predictable place: its version number (which may occur multiple times if you consider the whole path name as well). That makes scripting easy and allows versioning up in Nuke. If you put a comment token or artist name somewhere in the path name (\SHOT100\Spaceship\renderings\v005-newShading\…), you’ll need to write smarter pipeline scripts for no good reason.
- What happens if somebody accidentally moves a whole directory somewhere else? If you have a directory named “Shots” in every project folder, you can even wipe out a whole project on MacOS (drag “Shots” from one project into another and blindly click OK). Windows and Linux are not prone to such a major disaster but if you merge two shot folders have fun untangling them. Better use a short, project-specific prefix for the 2nd or even 3rd level directories inside a project folder.
Comp-Fu Answers Part 2
Once again I’ve pulled out keywords from my piwik reports!
graphics to rec709 lut
— anonymous
“Graphics” can mean a dozen things. If you have designed some stuff in Photoshop or taken screenshots, for example, they are probably in sRGB. To convert it in Nuke for a rec709 project, just select sRGB in the read node. This will linearize it and if you put on the rec709 LUT you’ll see that it appears a bit darker than in Photoshop. In Fusion, you can convert the image using the Gamut tool (input sRGB, output ITU-B-R.709, both gamma checkboxes enabled).
in fusion for which reason there is no gamma slider??
— anonymous
That made me laugh. All I could think of is this meme 🙂
I guess you mean the nifty viewer controls that Nuke has? You need to add a viewer LUT for this manually. There’s the GainGamma Fuse that ships with Fusion or my gpu accelerated sRGB/rec709 LUTs.
nuke ramp tutorials
— anonymous
Oh come on. What’s next? A tutorial on how to prepare a peanut butter sandwich?!
how many lens flares in total recall
— anonymous
Well, I didn’t count them when I talked about the movie on my blog. But here’s somebody who did!
Comp-Fu Answers Part 1
Welcome to my new show where I answer questions that are based on google searches that brought users to my website. (disclaimer: I’m using piwik for web site statistics and search keywords are transmitted by the user’s browser. It’s anonymous though, so relax.)
what is color space and color temperature
— anonymous
Thanks for your question, Mr Anonymous. Color Space and Color Temperature can be looked up on Wikipedia. In VFX specifically, the term color space usually means the way that a color is being split into separate channels for digital processing. RGB by default (red, green and blue channels). It can be converted back and forth to spaces like HLS, Lab, YUV and so on where you still have red, green and blue channels but now each channel contains a different color attribute. In HLS, the red channel contains a color’s hue, for example.
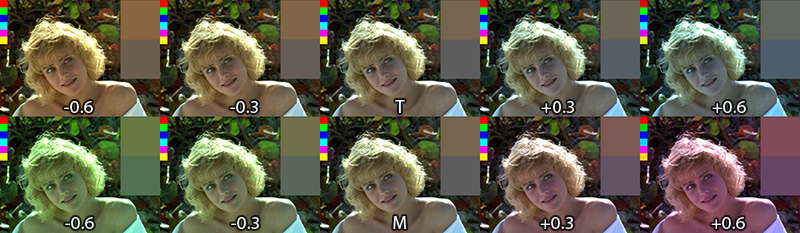
Color temperature is a measure for how cool or warm an image appears (top row of the image). It has a well-defined physical background but basically it’s your white balance setting. It can be adjusted in most RAW converters and although it’s not a color space you can adjust it using the TMI system which includes a magenta-green-value in addition to the orange-blue color temperature axis. It’s available in Shake and Nuke and I’ve made a macro that brings it to Fusion.
color temperature in Nuke
— anonymous
I think there’s no color temperature node in Nuke, but I adjust the temperature of an image using a Gain adjustment:
Open the gain color wheel and enable the TMI sliders if they’re not yet visible. Then, adjust the T slider to your liking. The image might appear brighter or darker now so as a second step, I use the V slider of the HSV group and bring it back to 1.0. This makes sure that the image stays as bright as before (that’s not totally true, but it’s a good rule of thumb. Of course you can tweak every slider to your liking).
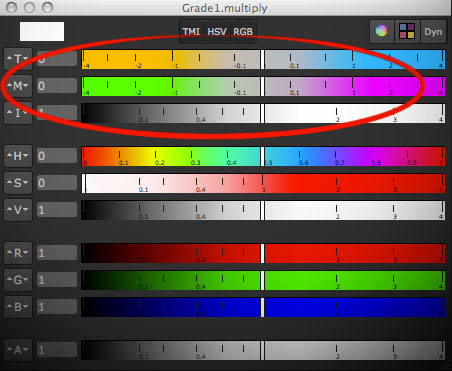
I choose the ColorCorrector instead of Grade or Multiply because it has a saturation slider that is applied before the gain and can be used to make the warm or cold tint of an image stronger (if you desaturate the image completely before tinting you’re doing what Photoshop’s Hue/Saturation adjustment calls colorizing the image).
game of thrones color grading
— anonymous
That’s funny. I’m no authority but a while ago I made a blog post on that topic. And coincidentally it involves color temperature 🙂