TMI Color Temperature Correction
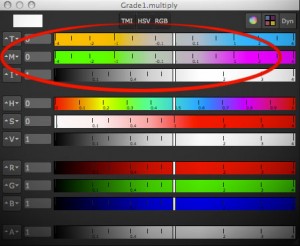 One of the things that I miss in Fusion whenever I have been using Nuke is a way to adjust colors using color temperature. Yes, there’s a white balance tool, but it’s a bit of a black box and it doesn’t have the kind of sliders known from Nuke (or even Photoshop’s RAW converter). I think Fusion’s tool is pretty accurate in terms of color science, but for eyeballing adjustments or creative tinting the other programs’ sliders are more useful.
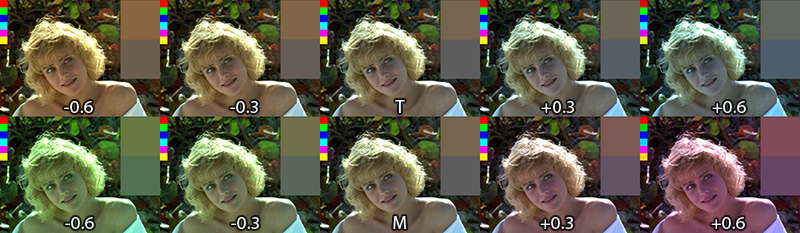
Nuke provides the TMI system in its color picker so you can use it anywhere you see a color swatch. One parameter adjusts the color temperature by moving red and blue in different directions (you don’t have to specify a proper temperature like 5300K). The second parameter is a shift along the magenta/green axis.
Here’s a macro which allows you to tint an image using this system in Fusion. I don’t know if the formulas I’ve reverse-engineered are only used in Nuke or if there’s a standard for TMI (it’s kinda hard to find information about it). It goes without saying though that all of this is only valid in a linear color space. Reportedly it was also useful to cancel the effect of the ARRI Alexa’s white balance and CC Shift settings.
update August 2013:
I’m getting a bunch of Google hits for the TMI system, although I haven’t spelled out the formulas I’ve used for my macro. Here they are (as used by Nuke’s color picker)…
Color Temperature (T):
Red Gain = 1 – T/2, Blue Gain = 1 + T/2
Magenta/Green (M):
Red Gain = 1 + M/3, Green Gain = 1 – M*2/3, Blue Gain = 1 + M/3
Intensity (I):
RGB Gain = 1.0 + Intensity
Download the macro here or view the help page on vfxpedia.
Immer die gleichen Filmplakate
Kreatives Echo oder einfach nur einfallslose Grafiker unter Zeitdruck? Im (frankophonen) Blog von Christophe Courtois gibt es eine Menge dieser Collagen aus den sich ewig wiederholenden Bildmotiven, die für Kinoplakate in Frage kommen. 2 davon habe ich hier wiedergegeben:
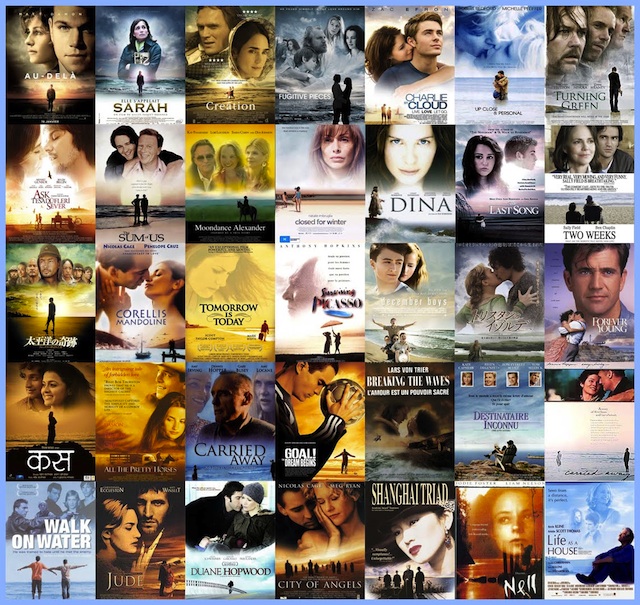
Strand und große Köpfe in den Wolken: Der Code für schnulzige Dramen
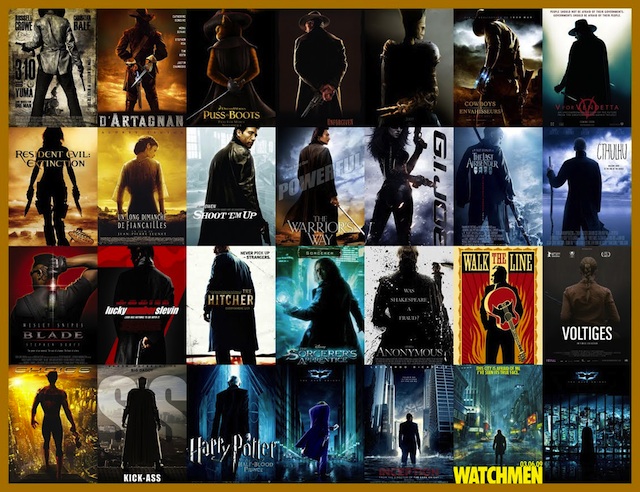
Einsamer Krieger von Hinten mit seiner Lieblingswaffe
Die Plakate gibt es auch auf den folgenden Seiten gesammelt, wenn man sich nicht durch Christophe’s Blog wühlen möchte:
- archdezart.com: Amazing Similar Movie Posters Collages
- boredpanda.com: 13 Popular Movie Poster Cliches
Eine eigene Aufstellung mit einer erschöpfenden Beschreibung verschiedener Plakat-Typen findet sich im Blog videoraiders: Oft kopiert, selten originell.
VFX Breakdown Effect (Breakdown)
I was pointed to an effects reel for “Wrath of the Titans” by Method Studios (you need to watch it on YouTube due to the usual licensing issues):
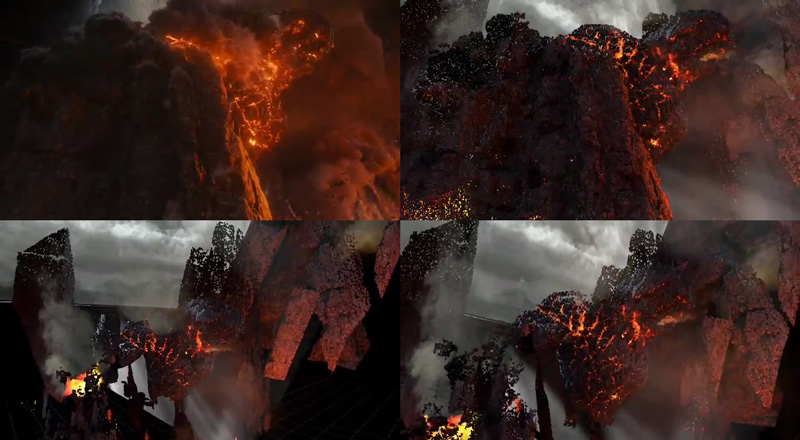
Stills from a vfx breakdown by Method Studios (not my work)
The shots look cool, but what was more interesting is the way they did the breakdown of their CG elements. Look at the camera moves at 0:14 or 1:17.
I’ve tried to dissect their technique using a Fusion comp and some random model I’ve downloaded from turbosquid (so don’t tell me it doesn’t look as cool as Kronos in the video above). The way I think this was done was by projecting the rendered passes back onto either real geometry or a recreation of the geometry using a world position pass. The latter is the only feasible solution for scenes with a high polygon count and can also be done as a particle cloud (see the “dissolving” rocks in the stills above).
Then, additional footage is brought in on image planes. Whether the footage was a 2D matte painting to begin with or a CG element doesn’t matter, for the breakdown it’s all treated like a 2D element. You can see this on the flat volumetric godrays.
To spice it up even more, they probably rendered additional passes especially for the breakdown (for example the wireframe pass) using the camera move designed for the breakdown shot. At this point you could also re-render your scene’s FX passes using the new camera move and treat the breakdown shot as if it was an original shot 🙂 Depends on how much work you wanna put into it.
Here’s a quick video that puts all the techniques together: particle cloud, projections, image planes and wireframe pass.
Mosaic Effect in Fusion
I’ve recorded another video tutorial for your viewing pleasure. It’s just a tiny effect, but the video shows that you can take even little tasks like this a bit further.
httpvh://www.youtube.com/watch?v=NL99jnhOzWk
Rocket Launch Reference Footage
This is an awesome video about an impressive feat of engineering. But I don’t just love the video and it’s voiceover from a technology-geek point of view. It’s also a great reference footage for rocket exhaust and the mayhem it causes. I would love to see more science-fiction authors take this into account when they allow space ships to launch and land as effortlessly as a taxi pulling up.
Watch it full-screen and turn on HD 720p!
Here’s another one: The sound track of a ride on a space shuttle booster rocket from its launch to its impact in the ocean.
Thanks to my colleague who showed me the aptly-named tumblr page FUCK YEAH SPACE EXPLORATION 🙂
Correcting Rolling Shutter in Fusion
eyeon has recently released its Dimension optical flow and stereo disparity toolset. I didn’t have a chance to test the stereo part yet, but since you can now calculate nice and crisp motion vectors, I’ve written a Fuse that can correct rolling shutter artifacts. Here’s a quick demo video:
You can get real-time performance on your GPU using OpenCL and as usual I’ve licensed my source code BSD-style if you want to tinker with it.
I haven’t had enough footage from different cameras to test the plugin thoroughly (just my iPhone and a Canon 5D Mark II). I also haven’t tested any other motion vector generators except for Dimension. Maybe Twixtor works as well, we’ll see…
Updated 2012-10-09: supports the rolling shutter method used by Syntheyes (center scanline is fixed)
 Download the plugin here: RollingShutter_v1_6.Fuse or head over to Vfxpedia.
Photo credits for icon: CC-BY Nayu Kim
