Eyeon Fusion on Mac OS using Parallels
Usually I don’t advertise random products for free, but this piece of software has really been a great investment: Parallels Desktop for Mac. It provides a virtual machine that allows you to run Windows and Windows programs inside Mac OS. Since Fusion isn’t available for Mac OS this is a great way to render my dual-boot setup (using Bootcamp to launch Windows 7) unnecessary in most cases. Note: This post is about Eyeon Fusion, not the competitor to Parallels – VMware Fusion!
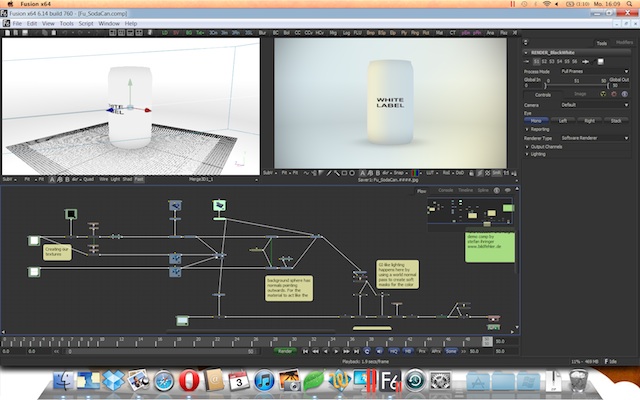
But it doesn’t stop here. Parallels takes the integration between Mac OS and Windows even further. It provides a “Start” menu for the Dock which contains all Windows programs. It provides neat icons for file types that are used by Windows (e.g. Fusion’s comp files) and I can double click files in Windows to open them in native Mac applications. Great for PDFs or Photoshop files. It can hardly get more seamless.
![]()
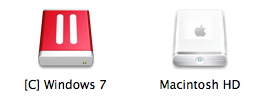
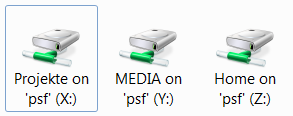
Moreover, Parallels fakes a complete workstation and provides arbitrary folders on my Mac drive as network shares (X:, Y:, Z:…) for Windows. It’s much more stable than Bootcamp’s HFS+ driver. And it allows me to easily mirror a client’s network infrastructure on my Macbook. I can just copy what I need for when I’m at home or on the road and all path names work like they would on-site. Of course it also works the other way around: Parallels provides access to the virtual machine’s C: drive as a network share within Mac OS which isn’t able to write to NTFS partitions on its own. The virtual machine’s C: drive really is a Bootcamp NTFS partition, so I can still dual-boot if I need my whole 8 Gigs of RAM for Fusion.
 Having said all of this, of course there are some caveats. Well, only one so far, but it’s annoying nevertheless: keyboard shortcuts. If you don’t want Parallels to disable all Mac shortcuts while using a Windows program, you’re sure to inadvertently trigger unintended stuff every other minute (opening Dashboard when pressing F4, switching Spaces by pressing Ctrl-Cursorkeys or confusing the Command and Control keys). Luckily, important shortcuts like copy&paste are mirrored as Command-C and Ctrl-C, but it’s still a bit more irritating than using Windows with a real PC keyboard. It’s a general problem with using Windows on a Macbook though, Parallels or not.
Oh, there’s a second issue. You can launch Fusion easily using a Dock icon, but Parallels will boot Windows inside its virtual machine first and you’ll need to log in manually if you have set up a password inside Windows. There’s no free lunch, but Parallels still beats dual-booting in most cases.
Addendum (since I’ve got a lot of visitors from google reaching this post): Parallels doesn’t emulate a GPU that supports OpenCL, which means that many new tools in Fusion will either be slow (Volume Fog) or won’t work (OpenCL rays). If you need to render these, you need to use Bootcamp.
Soda Can
[flowplayer src=’fu_sodacan.mov’ width=480 height=270 splash=’fu_sodacan.jpg’]
Made a small Fusion comp that relights a rendering of an FBX mesh using a normal pass which is also generated inside Fusion (requires verison 6.1+). Based on an idea from this youtube video. The mesh is a free one from turbosquid.com.
Contrast
I’ve always had a hate/hate relationship with the “contrast” slider – no matter which software. It would always clip the shadows, or worse, create negative values if used on floating point data (less of an issue in Photoshop but easily observable in Fusion). It looked ugly and I’ve spent a lot of redoing other people’s grading nodes because the color values were broken all over the place.
If you don’t know it already, here’s what the contrast slider usually does:
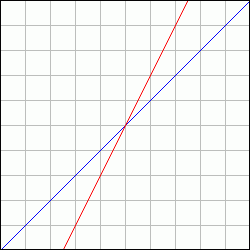
contrast as found in most image editing software
If you color-correct in sRGB (yuck) the slider really does change the picture’s contrast. But like I said, it clips shadow details pretty quickly. Which translates to “instantaneous” in linear (non-gamma-corrected) space where color values are tiny. The better way to increase contrast was an S-shaped curve tool (recently, Photoshop has finally improved its contrast algorithm and labeled the formula it used before as “legacy”).
Nuke also has a contrast slider in its color correction node. First I avoided it like the plague until I tried it on a test gradient to figure out what it does. Lo and behold, it’s actually usable since its formula has been re-invented for linear floating point pipelines. It is actually a gamma correction but instead of “pivoting” around a value of 1.0 it is anchored on 0.18 – neutral gray in linear space:
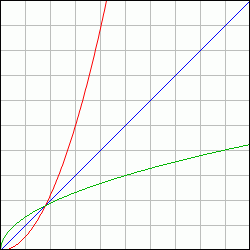
contrast as implemented in Nuke (on a scale from 0.0 to 1.0)
The formula is easy to implement: pow(color / 0.18, contrast_value) * 0.18
Of course it needs a failsafe when contrast_value is zero, but this is obviously a constant value of 0.18.
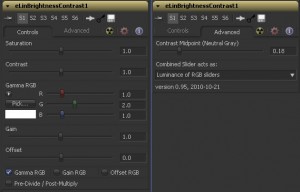
I have built this formula into a Fuse for Fusion along with Nuke’s other color correction sliders. This makes the tool useful to copy color corrections made in a Nuke script to Fusion. It could have been a macro, but the Fuse API allowed me to play around with the GUI and make Nuke users feel even more at home – myself included.
Download and more info at Vfxpedia.
Log2Lin
Analoger Film ist tot, mag sich mancher bereits denken. Doch ganz so schnell wird der Spaß mit dem dpx-Format und dem logarithmischen Farbraum vermutlich nicht verschwinden.
Bisher habe ich unhinterfragt als log-lin-Konvertierung nur die Standardkurven verwendet, die bekanntlich auf Kodak-Filmmaterialien von vor zig Jahrzehnten basieren. Black Level 95, White 685, Gamma 0.6.
Erst kürzlich hat mir jemand vom Filmexperten “Josh Pines” erzählt, dessen alternative Methode der logarithmischen Konvertierung wohl ein kleiner heiliger Gral sein muss. Zumindest in angloamerikanischen High-End-Schmieden (Weta usw.) ist sie im Einsatz und schon deshalb schadet es wohl kaum, sie zu übernehmen. Pines’ Formel behebt nämlich das Problem, dass negative Werte entstehen können, die im Compositing ein pain in the ass sind.
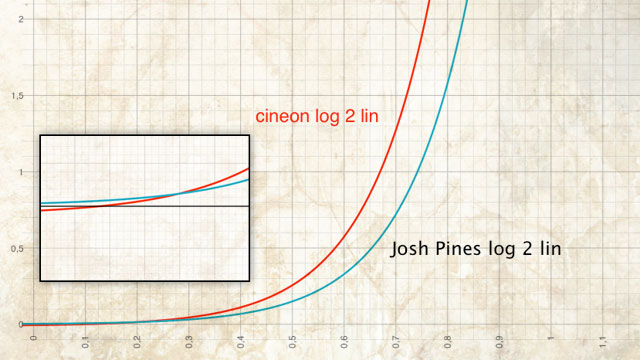
Eine leicht zu implementierende Version habe ich auf der OpenEXR-Liste gefunden. In der folgenden Formel ist x ist der Farbwert im logarithmischen Raum, er wird aber als float-Werte zwischen 0 und 1 eingesetzt, und nicht als 10-Bit-Wert zwischen 0 und 1023.
y = pow(10.0, (x * 1023 – LogReference) * 0.002 / Gamma) * LinReference
Gamma = 0.6
LogReference = 445
LinReference = 0.18
Und Rückwärts als lin2log:
y = (LogReference + log10(max(x, 0.0000001 ) / LinReference) * Gamma / 0.002) / 1023
Der Wert 445 auf der logarithmischen Skala wird auf den mittleren Grauwert im linearen Raum (0,18) abgebildet. Hier sind Implementierungen der Formeln als Fusion-Makro:
Das resultierende lineare Bild ist, wie man an der oben abgebildeten Kurve sieht, etwas dunkler. Im sRGB Farbraum fällt das wiederum wenig auf, das Bild wirkt lediglich etwas flauer, da die Schwärzen – siehe Ausschnittsvergrößerung – ja angehoben wurden.
Eyeon Generation 2 and File Naming Conventions
Just read about the upcoming release of eyeon’s next version of Generation. I’ve evaluated version 1 last year and while it was a really promising versioning and viewing solution for vfx shots there was one show-stopper for us: Its nifty incremental saving feature was hard-coded to a version number at the end of the file name. Since our pipeline had a more complicated naming scheme we couldn’t just drop Generation into it.
However, this bit from the press release sounds like they’ve made some improvements in that area although I’m not sure if that extends to incremental saves or just searching metadata:
A sophisticated search-function allows artists to define in-house filename conventions as a pattern and search by fields.
In case you want to know how that particular pipeline’s filename convention looked like:
[project]_[shot]_[status]_[version]_[artist name].comp
Yes, squeezing the artist name into the file name is naughty. And it’s just a way to cure symptoms, not to solve the problem. (The problem being lack of metadata about who worked on the most recent version of a packshot in case somebody else has to modify it when the ad agency asks for an updated version a few months down the road).
But it’s the best you can do without using a database or asset management system since it’s easy to use regular expressions on this and in a multi-OS environment it sorts nicely in Explorer / Finder / the console. A better way would have been to store this metadata inside the Fusion composition, and make no mistake, Fusion is indeed flexible enough to do this. But that would have meant circumventing the “Save As…” dialog with a custom script (did that too on a different job) and even then this metadata would have been hidden from view in Explorer.
But enough nerd talk for tonight 🙂
