Lesser-Known Fusion Features
Made another video tutorial:
httpvh://www.youtube.com/watch?v=tJ_yXEZ2OeQ
This one is a quick tour of a couple of lesser-known features in eyeon Fusion: changing the frame step size, proxy footage for loaders, hotkeys for roto, view and subview settings, local render queue, hardware status.
You might already know some of those “secrets”, but they pop up every now and then on forums so I thought I’d collect them into a small video.
Specular Highlights Compositing Reference
Welcome to the first installation of a series where I tell you how to improve your CGI/compositing by looking at frickin mother nature for reference.
Often CGI lacks that last bit of realism. In the case of outdoor surfaces it can be due to the lack of proper specular highlights. They require high sampling rates, they tend to flicker, but it pays off to spend some compositing effort on then – even if you ultimately paint and reproject them manually.
The key to realistic atmospheric effects are proper reference photos. Here’s a photo of one of Chicago’s commuter trains glistening in the morning sun:

The glow that seems to eat away from the steel roof looks like that because it comes from a reflection that’s magnitudes brighter than the rest of the image. To recreate this in comp you need to work in linear color space with values way above 1.0 and a sharp, super-bright yellowish reflection of the sun. Don’t be afraid to go up to 20 or even higher.
Now add a tiny blur to the image (the natural scattering of the air and the lens) so you hardly notice it on most of the image. The bright spot, however, will grow into a large glow not unlike one in the photo (then fine-tune your comp with different blur radii at different strengths or add a blurred luma key of the highlights once more).
Look at the car now. It’s parked in the shadows yet it doesn’t look murky or dark at all. It’s lit solely by the sky’s ambient light which is still bright enough to cause a lot of specular highlights. In reality – and from the point of view of an unbiased renderer like Arnold for example – there is no “specular pass” anyways. It’s all just tiny glossy reflections of a bright light source. And the sky is more than enough. I can’t tell you how to render rims like these but as a compositor you should be prepared to fake some highlights using a normal pass for example if the 3D lacks those details.
Some more thoughts about why the car in this picture looks so well-integrated (yeah, it’s real):
- The color of the highlights matches the sky. Especially the area around the front bumper turns into a mirror-like surface due to the Fresnel properties of the car paint. It matches the sky in color and brightness.
- The sun’s reflection on the train is so bright that it reflects once more in the car’s rooftop. Your raytracer would need to calculate at least two bounces!
- The wheels are black and you can hardly distinguish them from the car’s underside. Yes, clients would tell you they want to see the rubber if this were CGI. But try to balance it. Too much detail in the shadows would make this image look like one of those fake HDR images.
Feedback Loop
Being a VFX freelancer includes being able to judge the amount of work a task might take. Usually, that’s a thing artists loathe. After all, who knows how much nitpicking by the supervisor(s) and/or director there will be before a shot is approved as “final”?
There is, however, a simple way to train your judgment and get some experience for free: look at a shot you’ve finished a few weeks ago and pretend you’ve just been asked for the number of days you’d think you need to finish it. Then, compare this to the hours you’ve clocked in your studio’s attendance sheet or timekeeping system.
Pick appropriate shots.
Don’t pick the one you know turned into a nightmare because halfway through a simple rig removal the director didn’t like the dress of the actress anymore and requested a CG cloth simulation. Don’t pick the shot that was used to develop a CG character’s shading because that probably took way more time for reasons that had nothing to do with the shot itself.
Just judge your workload.
If you only did compositing, don’t make up numbers for matchmoving, lighting, shading and matte paintings. Except if you also did some of these tasks.
Don’t cheat.
This exercise assumes that you have no clue how many hours you’ve really worked on a shot. If you have only worked on shots one at a time and are completely aware of how many days it took you to finish each, it’s for the birds.
Add 50%.
I’m not kidding, just add 50% to whatever number you came up with.
Before VFX
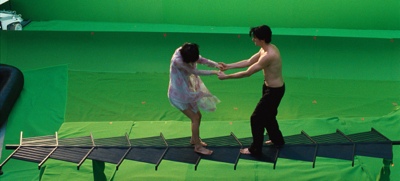
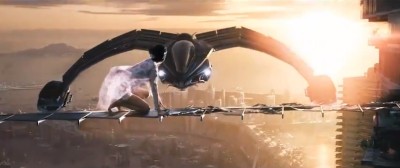
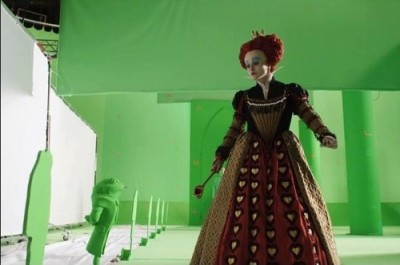
With the vfx industry being shaken by high-profile post houses closing doors or filing for chapter 11 and Oscar winning directors being oblivious of the effort that went into their movie’s VFX, here’s a nice Tumblr of movie stills before vfx have been added. I’ve taken two of those images and went looking for trailers and promo pictures that showed the final scene as best as possible:
But even with such a comparison, one can hardly describe the amount of work, changes and revisions that went on in between. VFX isn’t like building a car where there’s a clear blueprint on how many wheels there should be and how many revolutions the engine needs to perform.
When a director thinks that VFX should be cheaper than they already are, he should have an assistant read to him the feedback he gave vfx artists who worked on his shots over the course of a year and imagine himself talking like this to his car dealer, barber or chef 🙂
Ninjas In The Sock Drawer
Corridor Digital have done it again: Awesome dubstep video – slash – VFX demo. And it’s got KITTENS!
AFAIK they’re still doing it all with AfterEffects. But camera angles of life action and green screen plates and lighting demonstrate that they’re really putting in a lot of thoughts into their videos before they start shooting.
That’s better than what I usually have to handle on German mainstream movies where directors and DOPs are stuck in the 90’s when it comes to pre-production planning of VFX (“Storyboards? Animatics? Blocking? Nah, we’ll just roll the camera in any way we like and you guys will figure it out later. It’s greenscreen after all, I could do it on my Avid! Hey, why doesn’t it look like Harry Potter? Sure we’ve only paid you 1% of its budget, but that movie was like a decade ago.”)
An article about bad VFX business practices
Scott Squires has written a very very lengthy article about “Bad Visual Effects Business Practices” which everybody should read despite it’s length.
Did I already mention that it’s long?
But I can relate to so many issues:
Too many layers of approvals
If a task requires approval by 5 different layers of managers, that’s a problem. Each manager will have a different idea of the results required and will likely produce 5 different and conflicting notes or corrections.
Not understanding overtime
Management and those typically looking at just the numbers think that 12 hours is producing 50% more than 8 hours work. They’re wrong. As the number of hours go up the productivity of workers is going down.
Some comments on Scott’s article also raise interesting points:
“The bidding model hails from the construction industry and is meant to come with a fixed blueprint. (…) That’s why they dropped it on the movie set. Camera teams were like, “you did not tell us you’d be doing 100 takes”. So time based pay was adopted with a plan and a budget…” – Dave Rand
Yet, VFX shots are still a fixed bid even though the directors nowadays want full control over how every piece of glass is flying away from an explosion that’ll be on screen for half a second. It’s ridiculous. The most fun I had as a VFX artist was for an advertising company on a project with enough budget and people who knew their trade. Most work for Hollywood movies on the other hand was endless change requests by the director about the tiniest specks of dust in the remotest corner of the screen, burning buckets full of time and money in the process.
Smoothing a Shaky Camera Move in Fusion
Inspired by the Shake “SmoothCam” tool or F_Steadiness in Nuke I’ve written a plugin for Fusion that allows you to automatically smooth or stabilize a shaky camera move. Fortunately I had found a public domain program by a Finn called Jarno Elonen that determines an image’s transformation (scale, translation, rotation) based on a variable number of points. Without knowing anything about “reduced echelon matrices“, “least square fitting” or the “Gauss-Jordan Elimination” (those Wikipedia pages give me the creeps!) I managed to translate the code to LUA and it worked perfectly.
The secret is to interpolate the motion vector image down to as little as 2×2 values. These can then be fed as points to the algorithm. Even my naive approach of using a garbage matte to simply zero vectors that have distracting motion seems to work.
There’s also a video on YouTube about it as well. It’s a demo of my beta version that has an outdated interface but the way of using the Fuse is mostly still the same.
I don’t know how robust it is to various kinds of shaky, jittery, wobbly footage and some GUI decisions might seem odd. But on more than one occasion I was limited by what Fuses can currently do. Still, I think it works well enough to publish it to the Fusion community.
 Download the plugin here: SmoothCam_v1_0.Fuse or read the manual on Vfxpedia. Photo credits for icon: CC-BY Nayu Kim
